Thursday, August 30, 2012

Mama's Southern-style Barbecue Sauce. Sweet!

Barbecue sauces across the United States are as varied and different as folks' accents.  In the Deep South of Mississippi we like ours sweet.  Here in Leakesville, there's none any sweeter or better than Mama's.


Mama can't remember where she got the recipe.  Her best recollection is of an old cookbook that was Grandma's.  Grandma didn't make this sauce, though, only Mama.  She's made it for as long as I can remember.  And I've made it for as long as The Fellows can remember.  It's a fambly tradition.

Here's what you need:
 Three medium or two large onions
Garlic to taste
Brown sugar
Worcestershire sauce
Vinegar
Catsup

Finely dice the onions and put in a very large non-reactive pot.
I love lots of onions in this sauce.  This isn't a place for sweet onions either;
they'll cook to nothing without flavoring anything.
Use yellow or white onions.

Add garlic, finely minced or pressed, to the pot of onions.
I've had this Pampered Chef garlic press for a whiiiiile.
It doesn't have a readily affordable equal. 

Add three (yes three) cups firmly packed brown sugar.
 I really prefer dark brown sugar in barbecue sauce
but didn't have any on hand and wasn't going
to The Pig to purchase any.  Use what you have, right?

Add one half cup vinegar or pickle juice.
I usually have sweet pickle juice on hand just for barbecue sauce.
Not wanting to sacrifice any from a jar of pickles, red wine vinegar
was used instead.  Dill pickle juice is good here, too!

Add one half cup of Worcestershire sauce.
I'm not a brand name label consumer for most things.  There is,
however, only one Worcestershire sauce used in this house:
Lea & Perrins.  Others are too hot, too tart, too weak...
Pay the extra cents for the good stuff when it comes to
Worcestershire sauce.  It's worth it.

And most importantly:
Add a big can of catsup.
Is there any food can not shrinking while the price remains fixed?
This isn't a gallon of catsup at all!  Brand doesn't matter here. 

Stir it all in the big pot.

Place on low heat, stirring often to avoid sticking or scorching.

I don't know why the crock pot wasn't used tonight.
I guess with all the rain from Isaac and the beginnings of cabin fever,
it was good to be busy tending a pot.

Cook for almost two hours on low heat or until onions are fully cooked and sauce is almost standing-spoon thick.  It will continue to thicken some upon cooling.

Pour into jars or bowls or even leave it in the pot and let cool on the counter.

Tadadaaaa!

It'll be good in the refrigerator for upward of a month, maybe longer.  It doesn't last much past that around here;  not because it's spoiled, but because of getting used.

This isn't a sauce to have on the meat when  it's put on the grill.  The tomato base and brown sugar will burn in a heart beat!  When the meat is almost fully cooked, start basting with it, turning often to create layers of grilled sweetness right on the meat.  It's good for everything:  beef, pork, chicken, sausage, hot dogs, hamburgers, catfish.  Well, maybe not catfish...

Serve it on the side with brisket.  Use it for pulled pork.  You won't be disappointed.

Y'all enjoy!

Tuesday, August 21, 2012

Marinated Vegetable Salad


Looking for a cool vegetable salad recipe that can make a bunch or just enough and keep for a while in the refrigerator?  This is it:  marinated vegetable salad.  I've made a gallon  for a wedding reception over in Gulf Shores, Alabama this weekend.  I'd provided the food for the bride's uncle's wedding several years ago.  In a little community like Leakesville, you grow up knowing everybody.  The father of the bride and his little brother were both in Mama's kindergarten;  their mother is a class mate of Brother #1, their uncle a class mate of Brother #3.  I'd line out all the other connections but it'd get confusing after a while.  You might be tempted to make a Southern joke.  The South doesn't need one more joke...

There's no specific recipe to this recipe.  I'll show you what all is in this salad, but use what you and your family likes.  It's quick to put together.  So quick I forgot to show you all the veggies draining in the colander.

Here are the ingredients for the vinaigrette:
Apple cider vinegar
White vinegar
Grapeseed oil
Vegetable oil
Celery seed
Dill weed
Garlic powder
Granulated sugar

There's a ratio for a sweet and sour vinaigrette:  equal amounts of sugar and vinegar and half as much oil as vinegar.  And whatever herbs and spices your taste buds are set on.  I like the bite of apple cider vinegar but there is such a thing as too much of it, so I use half white vinegar also.  I've also been enjoying lightening up olive oil recipes with grapeseed oil but it's kind of pricey and is used sparingly.  Celery seed and dill weed are always good in a salad but if you don't like them, don't use them, it's just that easy.

Put all the ingredients into a microwave safe bowl or measuring cup and microwave for three or four minutes.  Stir and microwave again another couple of minutes.  All you're doing is making sure the sugar is melted and incorporated.

I know.  This is where I stand to ladle jelly into jars.
You can see splatters of jelly all over the front of 
the microwave.  I should probably clean that
tomorrow.

In the meantime, open all your vegetables and put in a colander to drain.  Asparagus is delicious in this, but I didn't add it.  It's one of those acquired tastes that not everybody likes.  Water chestnuts give a nice crunch, even if they aren't real flavorful.  They're cut into thin strips to keep from having a mouthful of sort of tasteless crunchiness.

That's a sweet onion.  I'd forgotten green onions
so used what was on hand.  

MMMMmmmmm.  Wickles:  wickedly delicious pickles.
Or in this case wicked pepper strips.  They're a little
hot and a lot sweet.  More and more often they're 
getting added to salads right along with
homemade sweet pickles.

When the vinaigrette is finished and onions (to taste) are diced, all the well drained vegetables are placed in  a large container.  Add the vinaigrette.

Tadadaaaaa!  That's all there is to it!
Let it sit a couple of hours for the flavors to marry.
It's much better the next day and even MORE 
better several days later (please don't call
the Grammar Police).

After I'd put the salad all together I thought about transporting it Saturday and the amount of room the gallon jug would take up in the cooler and having to leave the precious jug with the clients and depend upon them to get it back to me.  The better thought was to put the salad  into a large ziplock bag in a baking dish.  Ziplock bags conform themselves around other things in coolers.  I won't feel sad about leaving a bag behind...


Y'all enjoy!

Wednesday, August 1, 2012

Brownie Caramel Cheesecake

There's not really a backstory for this recipe.  Twenty or so years ago I thought I'd subscribe to one of those menu clubs.  You know them... Pay x amount of dollars and receive a dozen recipe cards to go in the bulky unwieldy large couldn't find a place for it  handy complimentary cheap plastic beautiful acrylic file box behind the confusing appropriate tabs.  You could have an entire year of expensive meals and non-kid-friendly desserts taking up a whole corner of the counter at your fingertips!  After three months I cancelled the subscription.  The plastic box became storage for Lego pirate weapons.  I did keep one recipe, though, and have made it for us through the years:  Brownie Caramel Cheesecake.

The pecan crust recipe comes from Brother #3.  I think he got it from Emeril but I wouldn't swear to it.  I use roasted pecans in everything but pecan pies.  Roasting brings out their nutty flavor and keeps them from getting soggy too quickly in cakes and salads.

Pecan Crust
2 cups all purpose flour
2 sticks butter
2 cups chopped pecans
1/2 teaspoon salt (strictly optional - I never use it)

Preheat oven to 450.  Mix flour, salt, and butter until consistency of cornmeal.  Add ground or finely chopped pecans.  Press mixture firmly in bottom and two inches up sides of a nine inch springform pan.  Bake for ten minutes until golden brown.

Now that's what the instructions say do.  You can certainly get cornmeal texture if the butter is cold.  I'd forgotten to leave the butter cold, having icing in mind this afternoon.  Does it make a difference if it's cold or not?  Not in this crust.
See?  All nice and mixed together and I didn't even get
the pastry knife thingy dirty!
I've discovered over the years to NOT start on the bottom
of the springform pan and then up the sides.  I start on the
sides, making them artfully not level all the way around.
And then I press the crust into the bottom.  This is a ten inch pan, 
by the way.  The recipe says nine inch but you'll regret using it.
And do yourself a favor and put the springform pan on or in 
something else.  Butter has a way of cooking out of the crust
to make a mess in the oven.

Let the crust cool completely.

Brownie Caramel Cheesecake:

Ingredients
1 14 ounce package caramels
5 ounces evaporated milk
2 cups crumbled unfrosted brownies
3 8-ounce packages cream cheese
1 cup firmly packed brown sugar
3 large eggs
8 ounces sour cream
2 teaspoons vanilla

Combine caramels and milk in a small heavy saucepan; cook over low heat, stirring often until caramels melt.  Pour over crust.  Sprinkle crumbled brownies over caramel.  Beat cream cheese at medium speed of mixer until light and fluffy.  Gradually add sugar, mixing well.  Add eggs, one at a time, beating just until blended.  Stir in sour cream and vanilla.  Pour batter carefully over brownies.  Back at 350 degrees for 50 to 60 minutes or until cheesecake is almost set.  Turn off heat and let cheesecake remain in oven another hour, undisturbed.  remove from oven and let cool to room temperature on a wire rack.  Cover and let chill at least four hours.  remove sides from springform pan.  Garnish with chocolate curls and whipped cream, if desired.

That's the EXACT recipe.  Do I do it that way?  uhmmmmm No'm.  I don't.

I make 'from scratch' brownies.  Did I have to?  Nope.
In a bind for time, I've used mixes.  In a real bind for
time I've used Little Debbie brownies.

 Do you see a pot?  No.  Microwave these candies.  Two minutes on
high, stirring to break up the candies and then three minutes on medium.
The quick-melt caramel chips work great!
A whisk will make the melted caramel nice and smooth.
Let it cool while putting together the rest of the cheesecake.
 Whip the cream cheese until very fluffy.  It makes for a
very smooth texture.
 Pinky extended is the only way to gradually add brown sugar.
 If you're using farm eggs like I am, always (and I do mean always)
break them individually into a bowl or cup.  Forget a rotten apple.
A rotten egg really will spoil the whole recipe.
 MMMmmmmmm...  Look at that KitchenAid go!
 Stir in the sour cream?  I don't think so.  Turn the KitchenAid or
mixer down to the lowest setting.
 Putting the caramel on the bottom could possibly result
in baked caramel under the crust. You'll need
a prybar to get it out of the pan.  If there is the smallest
fissure in the crust, the caramel will go through it if put on the crust first.
Trust me.  I know these things...  Put the brownies on first.
This is THREE cups of brownies, by the way.
Two cups just doesn't cover.


Pour the batter on ever-so-gently.  It'll push brownies and melted
caramels around if rushed.
 Bake.
It'll take another thirty minutes beyond this point.  
I don't know why but it can't be rocket
science.

Everything else is pretty much like the recipe says.  As much as I love chocolate, I don't garnish this cheesecake.  It'd be more awesome if it were, I'm sure, but a chocoholic has to draw the line somewhere.

Y'all enjoy!


Monday, July 23, 2012

Green (unripe and already picked) Peach Relish

There's no tutorial tonight, folks.  The concept for the recipe was thought over, a call made to X's mom to get the base recipe, the ingredients processed, and the relish cooked all within an hour.  The camera wasn't in the kitchen until after it was over.

Waiting for purchased peaches to ripen has never been
a virtue.  I made something of them tonight.


I bought a half-bushel box of Chilton County (Alabama) peaches yesterday, worked on getting them sorted and peeled, sliced, and into various solutions of sugar and spices and **snicker** other things nices.  There were two dozen really unripe peaches, initially intended for a couple of pints of pickled peaches for Brother #3 (he loves them) but the recipe couldn't be found and Google was not forthcoming with any facsimile.
MMMmmmmmmmm...

I looked for a peach salsa recipe to can and couldn't find one suitable.  I thought about processing the unripend fruit into peach slices but that'd be boring and waste of a great opportunity to make something very different than what's normally done with peaches around here.

I started thinking about relishes.  Peach relishes.  Green peach relishes.  Again, nothing could be found. You'd think a gozillion hits would yield at least one recipe, wouldn't you?  It didn't.  The gray matter was settled on a relish so it further spun to remember favorite relishes.  And then it remembered Aunt Judy's ripe tomato relish recipe.  Easy.  Ingredients already on hand.  I made it with two dozen unripe peaches.  It's phenomenally different while being incredibly familiar.  It's a relish suitable for field peas, butter beans, cornbread, and turnip greens.  If you find yourself with an abundance of the not-quite-ripe fruit of the Prunus persica, please oh please do yourself a favor and make this quick relish.

Two dozen medium peaches, not quite ripe, finely chopped (CuisinArt does this wonderfully)
1 very large purple or other sweet onion, finely sliced
1 large bell pepper, finely minced
1 1/2 cups white vinegar
1 teaspoon salt

Combine all ingredients in a non-reactive pot over medium heat until mixture comes to a boil, stirring to prevent sticking.  Turn heat down to low, stirring occasionally, until desired thickness is reached.

On the big stove it took thirty minutes from start to finish.

Can immediately.

I actually water bathed it for another thirty minutes, unusual behavior for me, but when in doubt, it's best to proceed with precaution.

This was the yield:  three pints and three half-cups or three and a half plus
a half cup pints?  Or maybe a half-cup shy of two quarts?  
I confuse myself. This is the entire yield.  I've quadrupled
the tomato relish recipe with no adverse affects so
there's no reason to think this green peach relish can't
be quadrupled.

Y'all enjoy!


Saturday, July 21, 2012

Praline Bacon: Deliciousness to Celebrate Every Breath

It's not my recipe.  I'd stumbled upon it on...well...on stumbleupon one evening several years ago.  NPR's John Burnett says it came from New Orleans and that's probably true:  there's not a single city that does pralines any better.  Praline bacon is a quick side to brunch, a delicious appetizer on a reception table, a late night indulgence when indulgence calls for salty and sweet together.  Or when cholesterol, brown sugar and pecans are craved simultaneously.  Even if you don't eat pork, you may want to fix this for someone that does, if only for the opportunity to be close to it just once.

I'd baked this a day ahead.  Once cooked, the bacon will keep in the 
fridge for a week or so.  I've also prepared it well in advance and frozen it
between sheets of wax paper in the big ziploc bags, the only
adverse affect to it being a slow diminishing of quantity due 
to pilfering by the cook!

The recipe is simple.  Three ingredients:
bacon
brown sugar (two cups or so)
chopped pecans

There are (almost) always roasted chopped pecans in 
the freezer here.  It's handy to have them ready to go
in a cheesecake crust or to add a crunch to chicken salad
or for a pan of praline bacon.

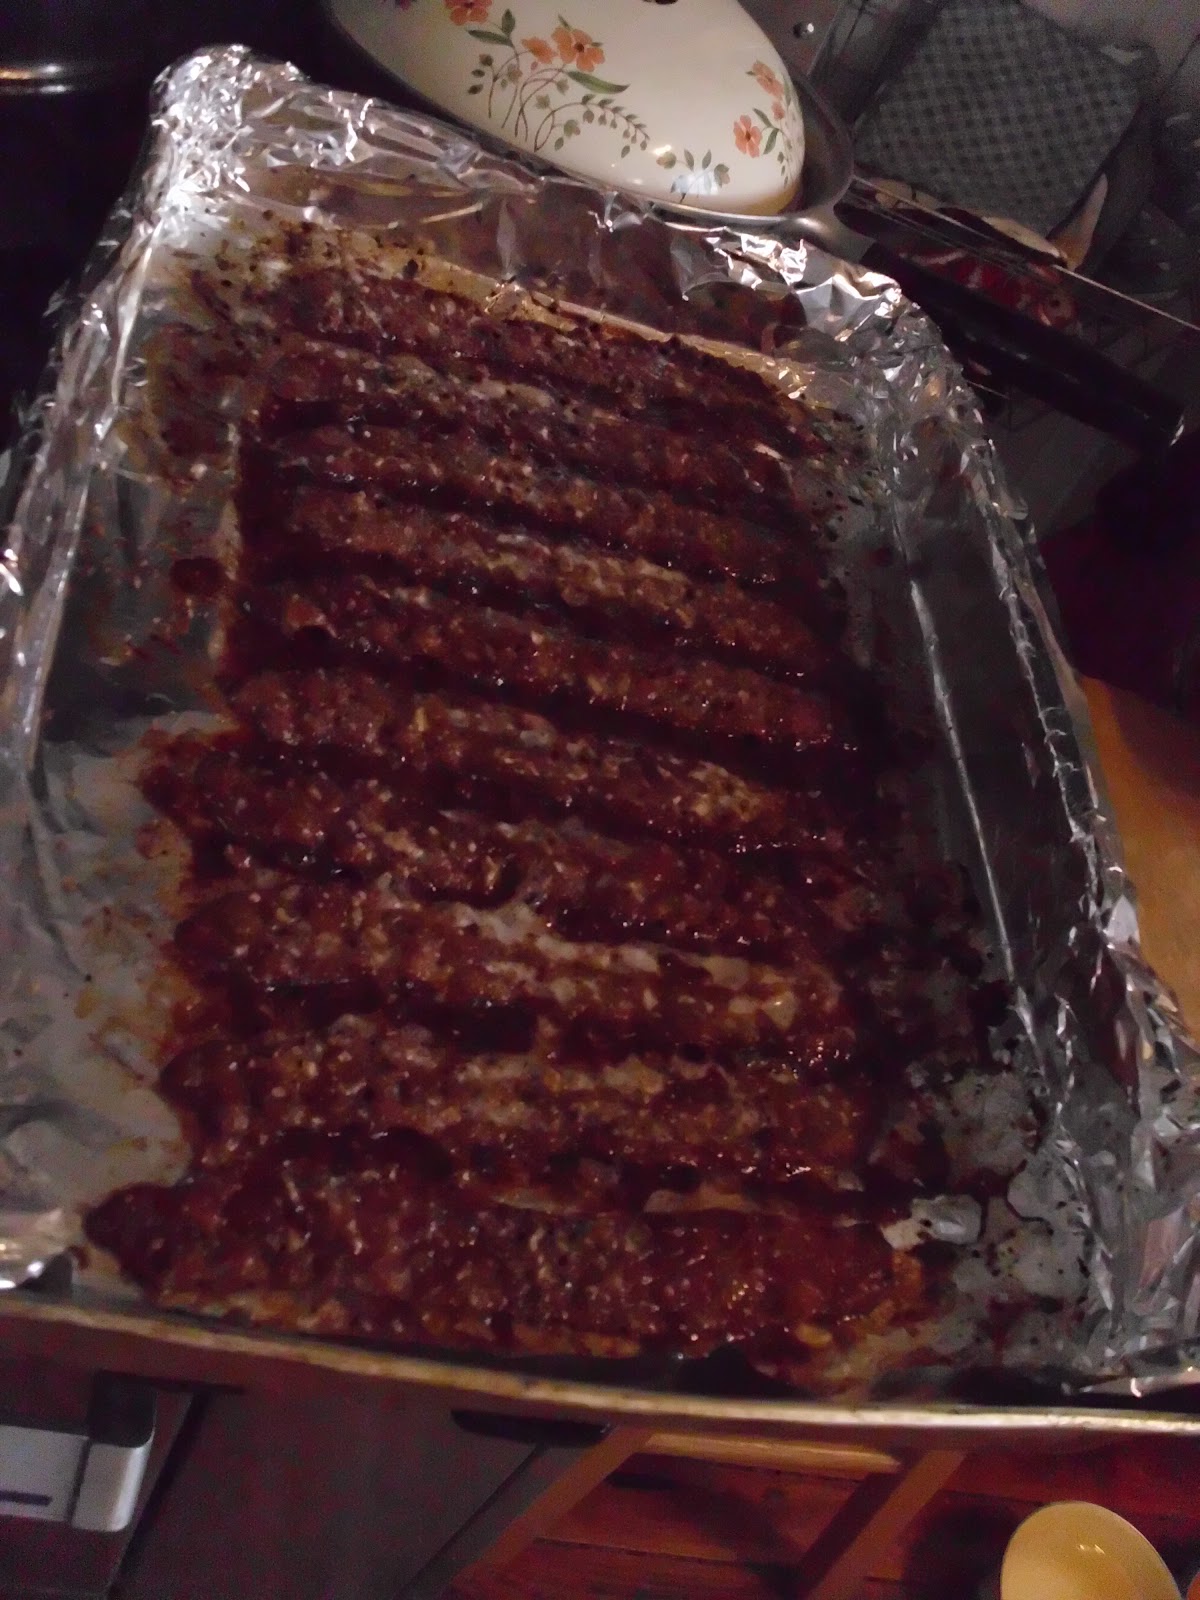
Make the clean-up easy on yourself.  Line a pan with foil and place bacon strips in single thickness in it.

If you don't need the whole pack of bacon praline-ated but despise storing a 
partial pack of it (it seems to get forgotten about until too late 
in the fridge here) go ahead and cook it.

And don't forget to save the grease for the potatoes!

Bake in a preheated oven at 425 Fahrenheit for ten minutes.  In the mean time, put the brown sugar and pecans in one of these big ziplock bags for coating the bacon.  You can throw the mixture in the freezer afterward and have on hand for the next batch of praline bacon.
If you're a lover of bacon, there will be another batch.

Drain off the bacon grease and put all the bacon in the brown sugar/pecan mixture. 

Seal the bag and give it all a good shake, flopping as only bag fulls of bacon can, to make sure all the slices are coated.

Return to the  pan.  I like to sprinkle a few more pecans on top.  You can't ever have too many pecans.

Bake for ten minutes more (or less - remember, the oven here bakes a few degrees cooler) and voila!!!
Praline bacon!

For quality control's sake, go ahead and have a slice of it, 
then quickly put it away if cooking for another day. 
Y'all enjoy!